
Here at Cordcutting.com, we're pretty big fans of the streaming boxes on the marketplace right now. Roku 4, Amazon Fire TV, and the rest are all good options for cord cutters. But not every cord cutter has the budget for a brand name streaming box, and not every cord cutter wants to use the operating systems that come on these devices. For those cord cutters, a more DIY solution might be in order.
And if a DIY streaming box is your cup of tea, there's no better place to start than with a Raspberry Pi. The Raspberry Pi is just $35, and the little computer is powerful enough to run a media center like Plex or Kodi. We've already showed you how to set Kodi up on the Raspberry Pi, but if you happen to prefer Plex, this is the article for you. While you can't run a Plex media server on your Pi, you can set up Plex on the Pi and stream off of another media server (like your computer). We'll show you how.
How It Works and What You Need
A Quick Note About Plex
If you're familiar with Plex, you know that its claim to fame as a media center is that it makes it possible to stream the same content on multiple devices. With Plex, you can set up a media center one one device and then install the simple Plex app on other devices, allowing you to stream your content from the server to anywhere Plex is installed.
In this project, we'll be installing the Plex app (not the server) on the Raspberry Pi. The Pi isn't quite up to the task of being the server, but it works pretty well as a streaming center.
Nerd Notes
Before we get underway, we should note that Plex is an app, not an operating system. So, technically, we're not installing Plex on its own: we're installing a very lightweight OS that will use Plex as its front end. This won't really matter for your experience, but it's a distinction worth making. We'll be installing RasPlex, which is based on OpenELEC. OpenELEC is a lightweight Linux distribution that can be used in the Kodi version of this same project. RasPlex just altered it to work with Plex instead. It's not an official Plex product, but it's safe and works pretty well.
What You'll Need
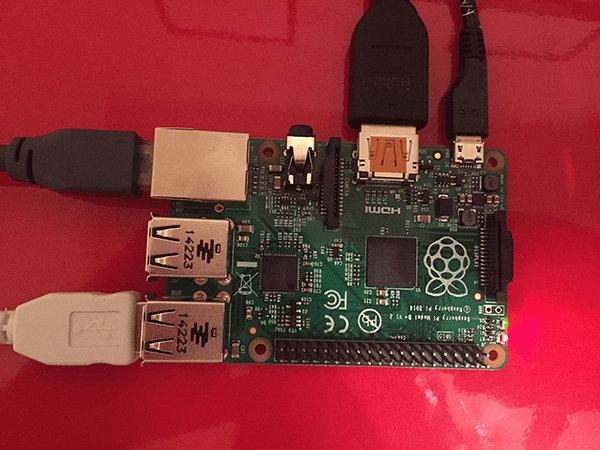
Raspberry Pi
– We're using the Raspberry Pi B+, which works well for this project.
Power source – Any micro USB power source that gives you 5V and 1 to 2 amps will do. For this particular project, 2 amps would be better.
HDMI cable – We have to connect the Pi to a TV or monitor, after all.
SD card or micro SD card – 4GB minimum. This will act as our mini hard drive for the Pi. Which size you need depend on the Raspberry Pi you have – for the one we linked to, you'll need a micro SD card.
USB keyboard, mouse, and/or controller – For setting up and controlling your device.
Computer with an SD card reader – We'll need this to put Plex on the SD/micro SD card. If you have a micro SD card, you may need a micro SD to SD adapter.
Ethernet cable or wireless dongle – You'll need an internet connection to stream through Plex's channels and to connect to your server.
(optional) A case – It keeps your Pi nice and safe.
How to Install Plex on a Raspberry Pi
Step 1: Plug Your SD Card or Micro SD Card Into Your Computer
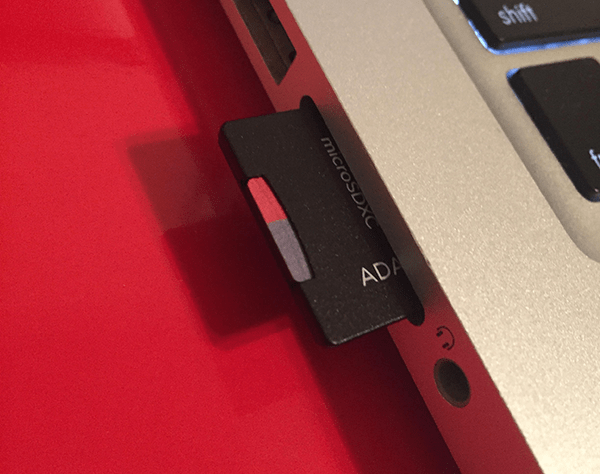
Which one you're using will depend on which type of Raspberry Pi you purchased. If you buy the Raspberry Pi we linked to, you'll want a micro SD card. That's what we're using in the photo (with an adapter to make it fit the Macbook's SD card slot).
Step 2: Download the Right RasPlex Installer for Your OS
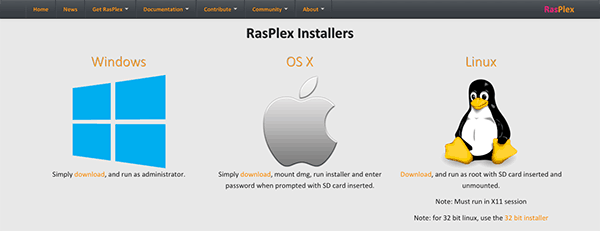
If you read the nerd notes, you know that we're using a lightweight OS called ¢€œRasPlex¢€ to run Plex (we always need an OS, but this one will run in the background so that we only see Plex when we turn on the Pi). To download an installer for RasPlex, just head over to their site.
Step 3: Run the RasPlex Installer
Windows users, you have to run this as an administrator. Mac people, you have double-click the .dmg file to install the app before running it. Both operating systems will ask you for your password.
Step 4: Choose the Right Version and Right Destination
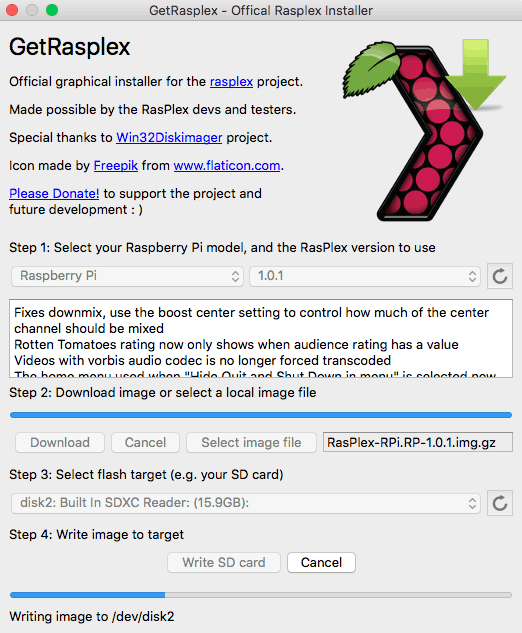
The version corresponds to your Raspberry Pi – if you bought the one we linked to, you want 1.0.1. You'll have to download RasPlex to your computer before choosing the destination – just put it somewhere convenient.
As for the destination, that's the SD or micro SD card you've plugged into your computer's SD card slot. Click “Write SD Card” to finish things off. Then just wait until the program finishes.
Step 5: Plug It All In
Once the OS is on your SD or micro SD card, put it in your Raspberry Pi. Plug in the HDMI cable, ethernet cable/WiFi dongle, and USB controller/keyboard/mouse. Plug the power in last.
Step 6: Set Up Plex
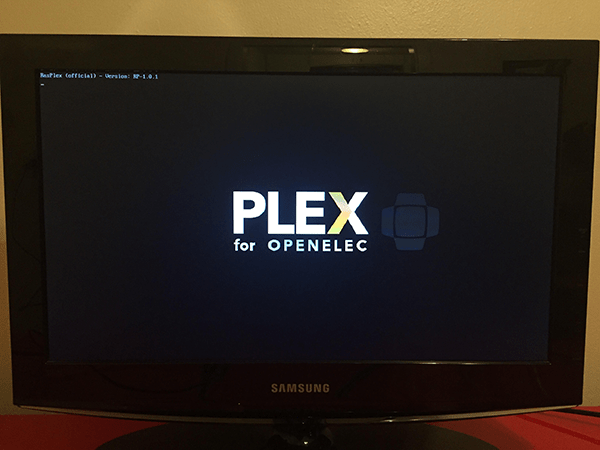
If you did everything right, you should see Plex boot right up. Now just set up your network and connect to your Plex media server – the program will walk you through it step by step.