It's not a great feeling: you buy a new antenna, eager to check out this free over-the-air TV that everyone is talking about. You plug it into your TV, turn on the TV, and – nothing. It doesn't work. There's just static, no free channels. You may think it's broken or that your region just doesn't get the channels you want, but the reality is that there's another step here we've forgotten: you need to scan for channels. Scanning for channels has little to do with your antenna and everything to do with your TV, which has to know what frequencies to tune into via the antenna. That means you're going to need to use your TV to do this. But how? Every TV is different, but we can outline the basic process so that you can determine how to scan for channels on your TV as quickly as possible.
What It Means to Scan for Channels, and Why We Do It
First, some background: what are we actually doing here, and why are we doing it?
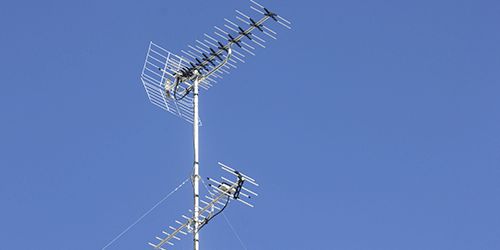
When you picked out your antenna, that's all you got: an antenna. Now, to be clear, not all antennas are created equal. But there's a reason that you can get OTA reception with a wire coat hanger. It's because all your antenna is designed to do is to pick up signals: lots of them, from all over.
Those signals come in different frequencies, so you need a tuner to tune to a particular one and get a lock on the information you actually want to receive. You've used tuners before, of course: you need tuners to listen to FM and AM radio, for instance. The TV tuner you need in order to use your OTA antenna is built into your TV.
When you channel surf, you want to be able to jump from one channel to the next, skipping all the fuzzy static in between. To make this possible, you first need to let your TV tuner take its time figuring out which frequencies offer strong enough signals.
So that's all we're doing here: giving your TV tuner (which is inside of your TV) a chance to find all of the channels you crave, so that your TV can act quickly when you change the channel.
How to Scan for Channels
To scan for channels, you need to go into your TV's menus and tell it what you're trying to do. Right away, you can see the (mildly) annoying part: since TVs come in all sorts of different forms, and since TV manufacturers don't all use the same menu layouts, learning how to scan for channels on your TV is going to be different from learning how to scan for channels on someone else's.
But there are some general rules of thumb that should help you in your quest to scan for channels, so let's take a look at how we might do so on a “typical” TV – you know, to the extent that there is such a thing!
Step 1: Setup
The whole point here is for your TV to use your antenna to scan for channels. In order to use it, naturally, it will need to be plugged in. So get that done, and put your antenna in a spot that you think will offer good reception. Generally speaking, higher is better.
Step 2: Hit the Menu Button on Your TV Remote
We'll soon be adventuring through the wonderful idiosyncrasies of your particular make and model of TV, but things will still be simple for just a moment longer. No matter how your TV has decided to present its menu options, we know we need to start by actually seeing the menu. That's easy: hit the menu button.
Step 3: Look for “Settings” or a Similar Menu Item
Almost always, the channel scan feature is going to be tucked somewhere in the Settings menu. So look for “Settings” on your menu screen, navigate down to it (if you don't have arrow buttons, try the channel buttons), and select it (if you don't have a button labeled “OK” or similar, look for one that's green – and, failing that, do some trial-and-error with important-looking buttons).
Step 4: Look for “Channel Setup” or Similar Menu Item
“Channel Setup” is probably the closest thing to a platonic ideal for this menu item, but manufacturers can get creative. Sometimes it's just “Channels,” and other times it may be labeled with some reference to input devices (be careful, though, as there may be other, unrelated menu items with “input” in the name). When it doubt, go back to trial-and-error. You'll know you've hit the right one if the next screen has words and options related to the next step – Step 5!
Step 5: Select Input Device and Scan for Channels
Once you're in the Channel Setup menu (or something similar), you'll be doing two things in some order: you'll be telling your TV that you're using an OTA antenna, and you'll be scanning for channels. This could take one of a few forms – you might have to navigate to a submenu for antennas, then scan, or you might have to hit scan and then explain what kind of input device you're using. Regardless, you'll want to make sure that you're selecting “antenna” (not “cable”) and hitting any confirmation buttons you may need to in order to scan for channels.
If you've done everything right, now's the time to sit back and watch your TV work. You may get a progress bar or merely a simple channel count (or even less!), but one way or another, your work is done: your TV will do the rest. Put the remote aside until your TV lets you know that everything has been taken care of.
Step 6: Troubleshoot
If all went well, then you're currently looking at a screen telling you how many channels your TV managed to pick up using your antenna. (If you're not, take another look at our advice in Step 4 and Step 5 and keep trying!) But you may not like the number you see – and that's okay, because it's not set in stone!
If you scan for channels multiple times, you may get a different number each time. And if you start moving the antenna, you're even more likely to see some variation. So if you don't like your channel options yet, use this to your advantage and see if you can troubleshoot your way to a better channel count! Swap the antenna's position, scan again, and repeat until you've maximized your channels. Or come back on a clear day – weather has an effect on reception, albeit a mild one. Our post on how to get the best antenna reception might be a help here, too. Good luck!
I can not find the words Air Antenna on my menu! Is Antenna just as good!